
Englische Version siehe unten / English version see below
Es gibt verschiedene Möglichkeiten, die Lagerbestände in Pickware anzupassen. Wir zeigen dir heute, wie du dabei am besten vorgehst. Beachte bitte, dass die folgenden Erläuterungen ab Version 4.0.0 der Pickware Plugins und Apps gelten.
Es gibt drei unterschiedliche Wege, auf denen du deine physischen Lagerbestände anpassen kannst:
Mit Pickware WMS passt du unmittelbar aus dem Lager heraus den Lagerbestand eines Artikels an. Wähle dafür in der Lager App zunächst das Lager aus, in dem du sich gerade befindest und wechsle in den Artikel Tab. Hier wählst du den gewünschten Artikel entweder per Scan oder über die Suche aus. Anschließend lagerst du eine beliebige Menge des Artikels auf einen bestimmten Lagerplatz ein oder buchst ihn von einem beliebigen Lagerplatz aus oder lagerst ihn sogar lagerübergreifend um.

Den Lagerbestand eines Artikels kannst du auch über das Shopware Backend ganz einfach in den Stammdaten des Artikels ändern. Über Bestände anpassen gelangst du in ein Fenster zur Lagerbestandsänderung aus dem entsprechenden Lager.
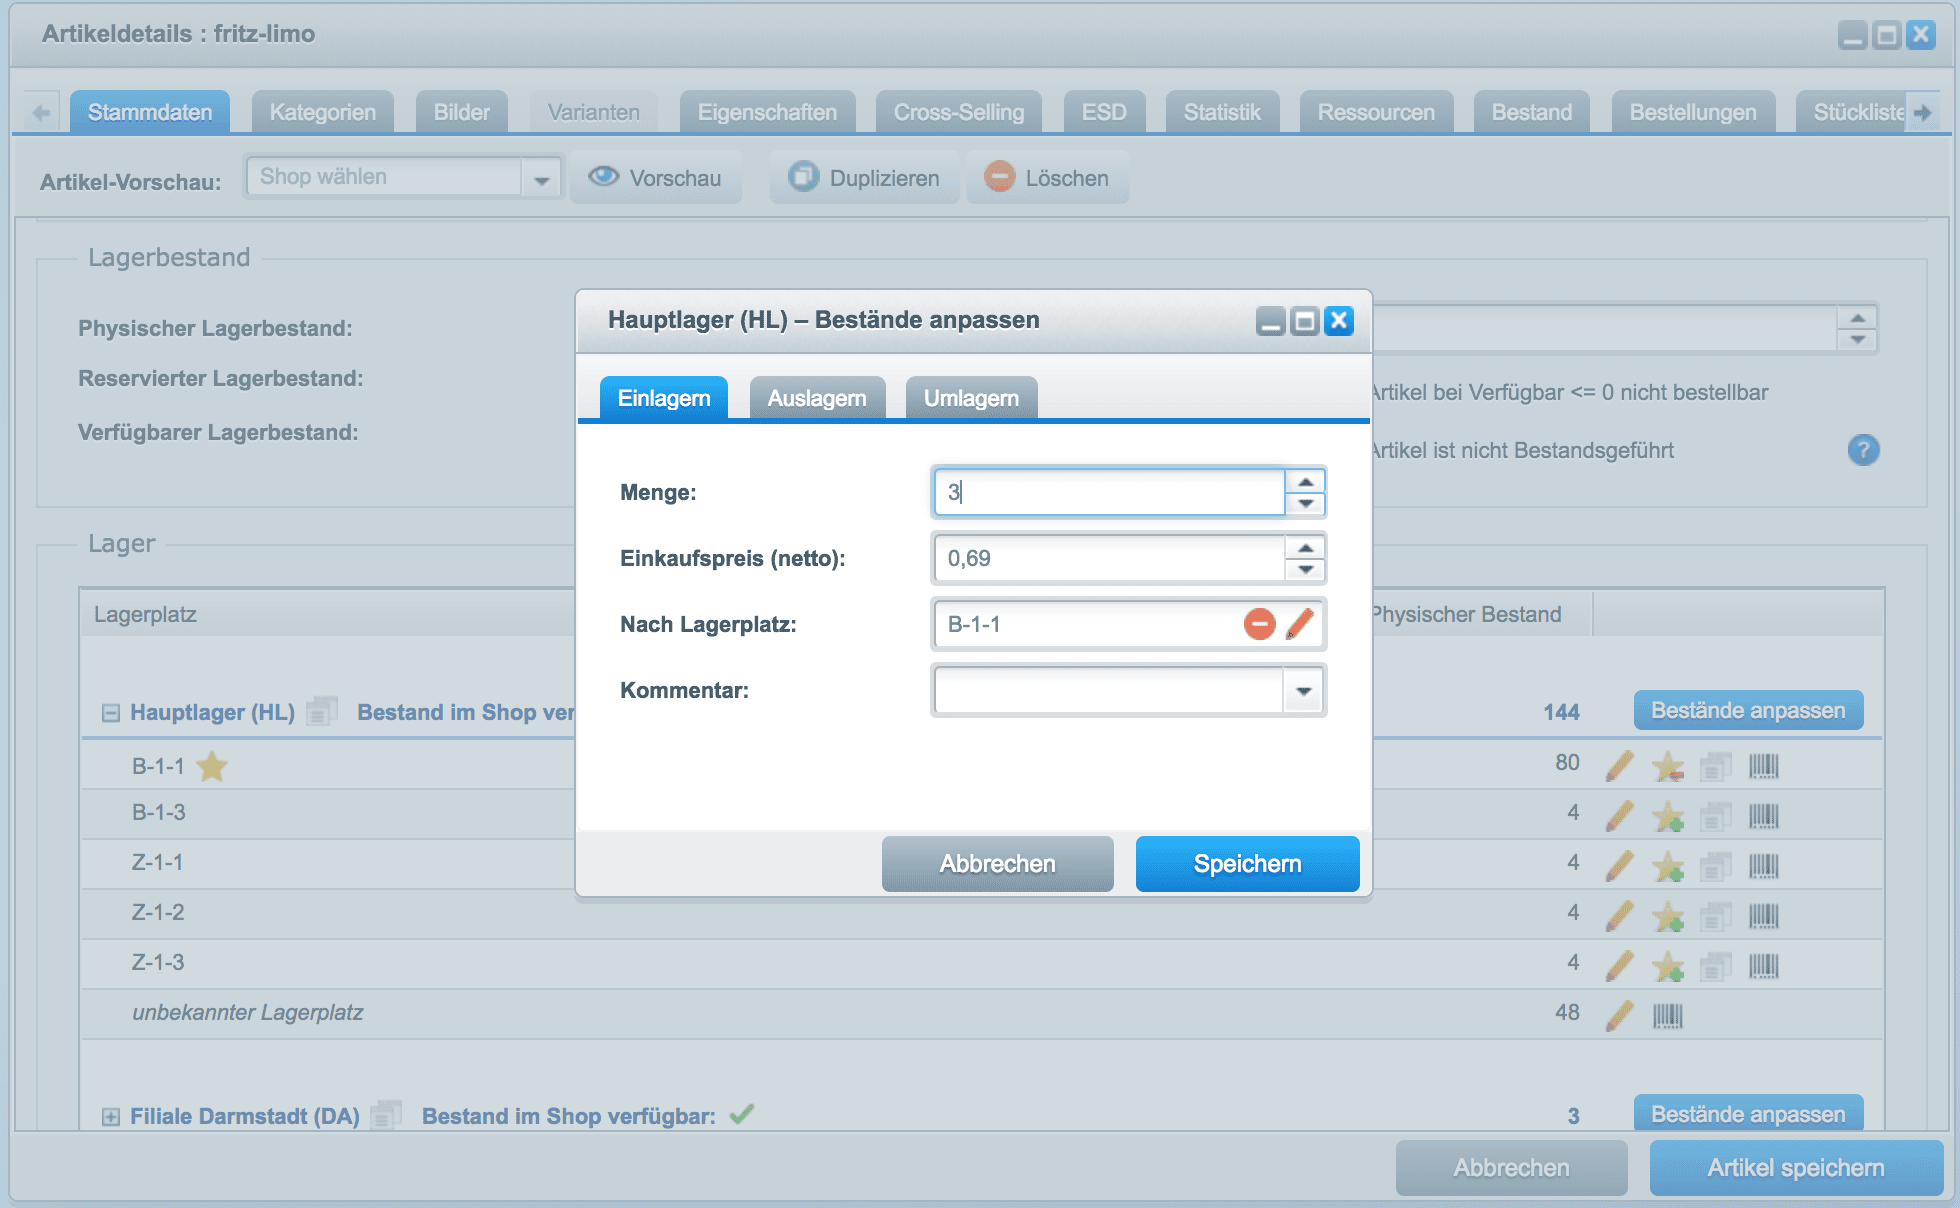
Analog der Pickware Lager App kannst du hier Lagerbestände ändern, indem du Artikel auf einen bestimmten Lagerplatz einlagerst, von einem beliebigen Lagerplatz ausbuchst oder auch lagerübergereifend umlagerst.
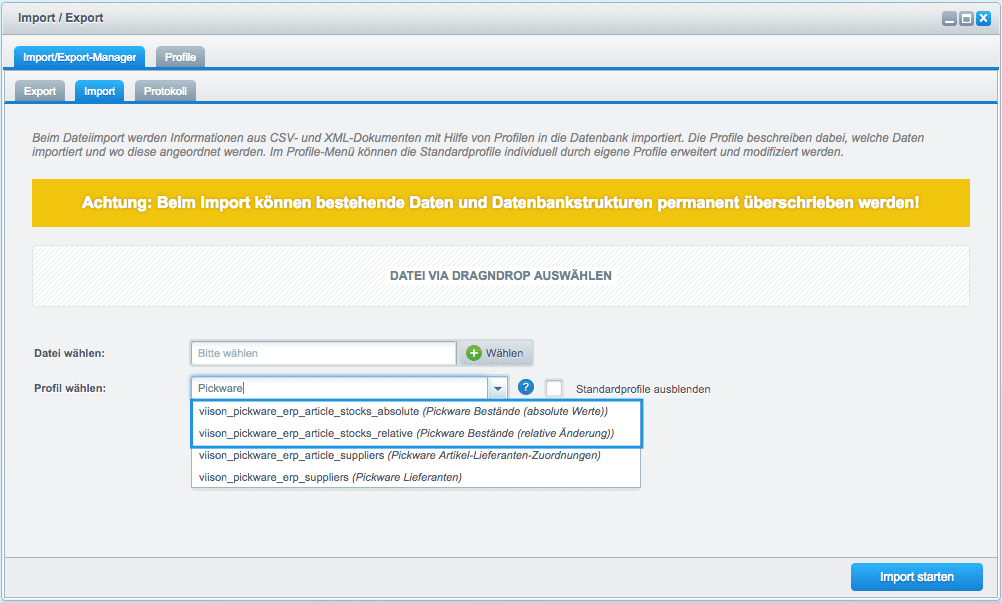
Wenn du die Bestände von einer großen Anzahl an Artikeln anpassen möchtest, empfiehlt sich dafür der Weg über den CSV-Import. Dafür benötigst du lediglich das kostenlose Import/Export Plugin von Shopware. Unter Inhalte > Import/Export > Import kannst du mit unseren Pickware Bestände-Profilen sowohl relative als auch absolute Bestandsänderungen per CSV-Import vornehmen.
Folgende Vorgehensweise empfehlen wir dir, wenn du deine Lagerbestände per CSV-Import anpassen möchtest:
Bei der absoluten Bestandsänderung per CSV-Import sollte beachtet werden, dass der physische Lagerbestand durch den Import überschrieben wird. Bestandsänderungen zwischen Ex- und Import gehen somit verloren.
Bei einer relativen Bestandsänderung per CSV-Import kannst du nach dem gleichen Prinzip vorgehen:
Die relative Bestandsänderung bietet den Vorteil, dass die Lagerbestände nicht überschrieben, sondern lediglich erhöht oder reduziert werden. Somit bleiben Bestandsänderungen aus dem Zeitraum zwischen dem Ex- und Import der Datei erhalten.
Deine physischen Bestände stimmen, du hast jedoch Inkonsistenzen in deinen verfügbaren und reservierten Beständen? Hier findest du eine Anleitung zur Bereinigung von Inkonsistenzen.
Wir hoffen dieser Teil unserer Reihe Pickware 1×1 konnte dir weiterhelfen. Lasse uns gerne Feedback oder auch Themenwünsche zukommen. Hier findest du alle bisherigen Teile der Reihe Pickware 1×1.
By choosing one of the following approaches disclosed in this blog post, you will be able to adjust and correct your physical inventory. Please note that said explanations apply as of version 4.0.0 of the Pickware plugins and apps.
Should you use Pickware WMS, you are able to regulate your stock through the Inventory App without requiring access to your Shopware backend. To do so, open the app, select the appropriate warehouse and switch to the Article tab. Using either the search field or the scanner, you can choose the desired article. Now, you are able to decide between the options of storing, releasing and relocating the article by any given amount and to any given bin location.
Furthermore, you have the possibility to revise your stocks via the Basic Info of an article in your Shopware Backend. Choose Edit stock to access a window allowing you to change the stock of an item in the corresponding warehouse. Similar to the Pickware WMS Inventory App, you can change warehouse stocks by placing items into a specific bin location, clearing them from any bin location or transferring them to another location that is ready for storage.
If you want to adjust the stocks of a large number of items, we recommend using a CSV import, which requires the free import/export plugin from Shopware. Under Content > Import/Export > Import you can select one of our Pickware Inventory Profiles to make both relative and absolute inventory changes via CSV import.
We recommend the following procedure if you want to adjust your warehouse stocks using CSV import:
If you use the CSV import to make absolute stock changes, note that the physical warehouse stock is overwritten by the import. Stock changes between export and import are therefore lost.
You can use the same principle for a relative stock change via a CSV import:
The advantage of the relative stock change is that the warehouse stocks are not overwritten, but only increased or reduced. This means that stock changes from the period between the export and import of the file are retained.
Your physical stocks are correct, but you have inconsistencies in your available and reserved stocks? Click here to find instructions on how to correct inconsistencies.
We hope this part of our Pickware 1×1 series has helped you. Please do not hesitate to send us your feedback or topic requests.